
Playwright E2E testing means writing automated tests that drive a real browser (clicking, typing, navigating) to verify your app end-to-end the way a user would. Playwright is Microsoft's open-source library covering Chromium, Firefox, and WebKit with one API, auto-waiting built in, and parallel execution across browsers.
Playwright is unusual software. The first hour is genuinely pleasant: install it, watch it generate a sample test, run it, see it pass. The docs are excellent. The error messages are readable. The community has answers for everything.
Then you try to run it in CI against a feature branch that deploys to a unique URL every pull request. The pleasant hour ends.
This guide follows the full arc deliberately. The early sections are a real tutorial — follow along and you will have a working, well-structured Playwright suite by the end. The later sections address where most teams hit the wall: CI/CD integration, preview environments, dynamic URLs, and the maintenance ceiling that eventually surfaces for every coded test suite. If you have already set up Playwright locally and you are here for the CI/CD or preview URL sections specifically, skip ahead.
This guide is current as of April 2026 and reflects the current Playwright stable line (1.59 as of publication) and GitHub Actions workflow syntax in use today. Playwright moves quickly; the patterns here favor stability over bleeding-edge features.
Why Playwright? (And How It Compares)
The browser testing landscape has three serious options for web E2E: Playwright, Cypress, and Selenium. They are not interchangeable and the differences matter before you commit.
Playwright runs tests outside the browser in a Node.js process, driving Chromium through the Chrome DevTools Protocol and driving Firefox and WebKit through Playwright's own patched builds and control protocol. That cross-browser reach from a single test suite is the architectural payoff: no same-origin restriction, first-class support for multiple tabs, iframes, and file downloads, and a headless-by-default execution model that is fast in CI with no display server needed.
Playwright vs Cypress
Cypress runs inside the browser, which makes its DevTools-based debugging excellent and historically made cross-origin a real constraint. If your application ever redirects through a third-party OAuth provider, a payment processor, or any domain you do not control, Cypress used to add friction. Since Cypress 12 (December 2022), cy.origin() is a stable API that handles most cross-origin flows — the old experimentalSessionAndOrigin flag was removed when it shipped. Playwright still handles cross-origin without any origin-scoped API at all, which is the cleaner model, but the gap is smaller than it was three years ago.
Playwright vs Selenium
Selenium is the old guard — stable, widely supported, integrates with every CI system, and has mature bindings across Java, Python, Ruby, C#, and JavaScript. Playwright also ships Java, Python, and .NET bindings, so "which one talks to my backend's language" is not the differentiator it once was. The real cost of Selenium today is verbosity and slower execution: its auto-wait story requires explicit waits in a way that Playwright and Cypress both handle automatically.
The 2026 Default
For a new web project in 2026, Playwright is the right default. It is fast, multi-browser, well-maintained by Microsoft, and its async-first API matches how modern JavaScript is actually written. The Playwright vs Cypress breakdown covers the trade-offs in more depth if you are evaluating both seriously.
A quick note on test-pyramid position: E2E tests belong at the top of the pyramid, not the base. Unit and integration tests should absorb most of your coverage — they run faster, fail more precisely, and catch different classes of bugs. Reach for Playwright when you need to verify a full user journey across the full stack, not as a substitute for component-level testing.
Installing Playwright and Project Structure
The scaffolding command does more than install dependencies:
Running this creates a playwright.config.ts, a tests/ directory with example specs, and a tests-examples/ folder. The installer also prompts you to choose browsers (Chromium, Firefox, WebKit) and whether to add a GitHub Actions workflow. Say yes to GitHub Actions — we will build on that scaffold later.
The project structure that works at scale is not the default. Here is what it should look like after you have it organized:
playwright.config.ts— project config, browser targets, base URL, reportertests/— spec files, organized by feature or user flowpages/— Page Object Model classes (for larger suites)fixtures/— custom fixtures for shared state and setup.github/workflows/playwright.yml— CI definition
Keep test files named with .spec.ts. Playwright's config defaults to finding files matching **/*.spec.ts, so this naming convention lets you drop new specs anywhere without updating config.
Playwright Config: The Foundation
The config file controls almost everything: which browsers to use, where your app lives, timeouts, retry behavior, output. Get this right once and the rest of the suite builds on a solid foundation:
A few decisions in that config deserve explanation. The baseURL field is the most important: it lets every test call page.goto('/') instead of page.goto('http://localhost:3000/'). When you swap to a preview environment URL later, you change one line in config (or set an env var) and every test immediately targets the new URL.
trace: 'on-first-retry' captures a full browser session recording only when a test fails and is being retried — the exact moment you need it without generating traces for every passing test. screenshot: 'only-on-failure' follows the same pattern. Together they give you the evidence you need in CI without inflating artifact storage.
retries: process.env.CI ? 2 : 0 is a practical pattern: zero retries locally forces you to fix flakiness immediately, while CI gets two retries to handle genuine environmental variance (network timeouts, container startup race conditions).
Writing Your First E2E Test
A homepage test is the right starting point — not because it is simple, but because it exercises the full cycle: navigate, assert visible content, done.
Choosing the Right Locator
Before you write assertions, you pick how to find elements. Playwright supports many locator strategies; the ones you should reach for, in order of preference:
page.getByRole()— accessible, stable, survives most refactors. Use for buttons, links, headings, form controls.page.getByLabel()— for form inputs with visible labels. Mirrors how users actually identify fields.page.getByPlaceholder()— fallback for unlabeled inputs. Less stable than label but better than a CSS selector.page.getByText()— for unique visible copy. Works well for links and headings where the text is the identifier.page.getByTestId()— explicitdata-testidattribute, the stable fallback when nothing else fits.
Avoid raw CSS selectors and XPath unless you have no alternative. They break on the smallest markup change and tell the next reader nothing about what the test is actually checking. A test that uses getByRole('button', { name: 'Submit' }) survives a class-name refactor; a test that uses .btn-primary.submit-btn does not.
The test.beforeEach navigates to the page before every test, so each test starts from a clean, known state. The assertions use toBeVisible() rather than checking that elements exist in the DOM — an element can exist in the DOM but be invisible (hidden by CSS, covered by an overlay). Playwright's auto-wait means these assertions retry automatically until the element is visible or the timeout expires.
Form interaction is the next level of complexity. Login flows test two critical paths at once: the happy path (correct credentials work) and the error path (wrong credentials show an error message). Both matter for real coverage:
Notice that the login test does not just verify the URL changed after submit — it verifies the application actually rendered the dashboard. A redirect without a loaded page is a half-pass that misses real failures.
Advanced Patterns: Page Objects, Fixtures, API Mocking
Page Objects
Once you have more than a handful of tests that all interact with the same UI, the same locators and interactions start appearing in multiple test files. A login interaction duplicated across ten specs means ten places to update when the login form changes. Page Objects solve this by centralizing interaction logic.
The key insight about Page Objects: they should encapsulate actions (click, fill, navigate) and expose the minimal API that tests need. They should not contain assertions — that is the test's job. A Page Object that asserts is testing the Page Object, not the application.
Fixtures
Fixtures are the more powerful pattern for 2026. Where Page Objects abstract interaction, fixtures abstract state. A loggedInUser fixture handles the full setup and teardown of an authenticated session. The test body never sees a login form.
The distinction between Page Objects and fixtures is not that one replaces the other — they address different concerns. Fixtures manage state (who is logged in, what is in the cart, what environment is active). Page Objects manage interactions (how to fill the checkout form, how to navigate to settings). Well-structured suites use both.
Reusing Authentication With storageState
Logging in through the UI before every test is slow. If you have 80 tests and each one clicks through a login form, you are burning seconds per test on setup that is identical across all of them. Playwright's storageState pattern solves this: run the login once in globalSetup, serialize the resulting cookies and localStorage to a JSON file, and configure every test project to load that state before it starts. The test body wakes up already authenticated. Combine this with a fixture like loggedInUser that loads the right state file for the right role, and your tests stay readable while setup drops to near-zero. Keep a separate test project for login flows themselves — those are the only tests that should actually exercise the login UI.
API Mocking
Not every E2E test should hit a real backend. Tests for UI edge cases — empty states, API error handling, slow network responses — are faster and more reliable when you control the network response. Playwright's page.route() intercepts requests before they leave the browser:
Route interception uses glob matching for string patterns by default — /api/products/ catches a family of endpoints, and you can pass a RegExp or a predicate function for finer control. The handler receives the route and the request, so you can inspect the request (check auth headers, validate the request body) before deciding what response to return. Keep patterns as narrow as the test requires: overly broad globs accidentally intercept unrelated traffic.
Common Playwright Mistakes to Avoid
The same handful of anti-patterns show up across every failing Playwright suite we have reviewed. Watching for these early is cheaper than unwinding them later:
- Hard-coded
waitForTimeoutcalls. If your test is waiting for a specific number of milliseconds, you are encoding a guess. Assert on a visible element instead; Playwright's auto-wait does the right thing without flake. - CSS selectors where a role-based locator would work.
.btn-primarybreaks on the next design system refactor.getByRole('button', { name: 'Submit' })does not. - Concatenating strings to build URLs.
baseURL + '/checkout'fails on trailing-slash edge cases and protocol mismatches. Use theURLconstructor. - Assertions inside Page Objects. A Page Object that asserts is testing itself, not the application. Keep assertions in the test body; keep actions in the Page Object.
- Asserting on URL change without asserting on rendered content. A redirect is cheap to fake. Assert that the destination page actually rendered the content a user would expect to see.
Debugging Failed Tests: UI Mode, Trace Viewer, and --debug
When a test fails, the question is always the same: what did the browser actually see? Playwright gives you three tools for this and each one fits a different moment:
npx playwright test --ui opens UI mode — an interactive runner with a timeline, watch mode, and time-travel through every action. This is where you live when developing tests. You can re-run a single test on file save, hover over any step to see the DOM snapshot at that moment, and inspect network requests without leaving the window.
npx playwright test --debug opens the Playwright Inspector. This pauses execution at the first line and lets you step through actions one at a time, modify locators on the fly, and confirm selectors against the live page. Reach for it when a specific selector is misbehaving or you want to understand why an element is not yet interactable.
npx playwright show-trace trace.zip is for post-mortems on CI failures. The trace artifact captured by the GitHub Actions workflow contains every action, every network request, and a full DOM snapshot at each step. You get the equivalent of watching the failed test replay in slow motion — exactly what happened, what element was missing, what assertion triggered.
One more: npx playwright show-report opens the HTML report locally after any test run. The report embeds traces, screenshots, and console output per test. Bookmark the command.
Playwright in CI/CD: GitHub Actions
Running Playwright locally is table stakes. Playwright CI/CD integration is where the real value lives — catching regressions on every pull request before they reach main. The GitHub Actions setup has three important additions beyond just "run the tests": browser caching, sharding for speed, and artifact upload for failed test traces.
The browser caching step is easy to miss and matters for CI speed. Playwright browsers (Chromium alone is ~100MB) download on every run by default. Caching on the Playwright version string means browsers only re-download when you upgrade Playwright, which happens maybe once a month.
Sharding splits your test suite across multiple parallel runners. A 300-test suite that takes 12 minutes on a single machine takes 3 minutes across four shards. The --shard=${{ matrix.shardIndex }}/${{ matrix.shardTotal }} syntax is Playwright's native sharding — no extra tooling needed.
The artifact upload on failure is the piece most tutorials skip. Without it, a CI failure gives you a test name and an error message. With the trace artifact, you have the full browser session recording. Download the zip, run npx playwright show-trace trace.zip, and you see exactly which element was missing, exactly which network request failed, exactly which assertion triggered.
The Playwright E2E Testing Complexity Curve
Here is what nobody tells you when you start with Playwright: the difficulty is not uniform. It escalates in stages that are easy to underestimate. This four-stage progression — what we call the Playwright Complexity Curve — is the pattern every scaling team eventually hits.
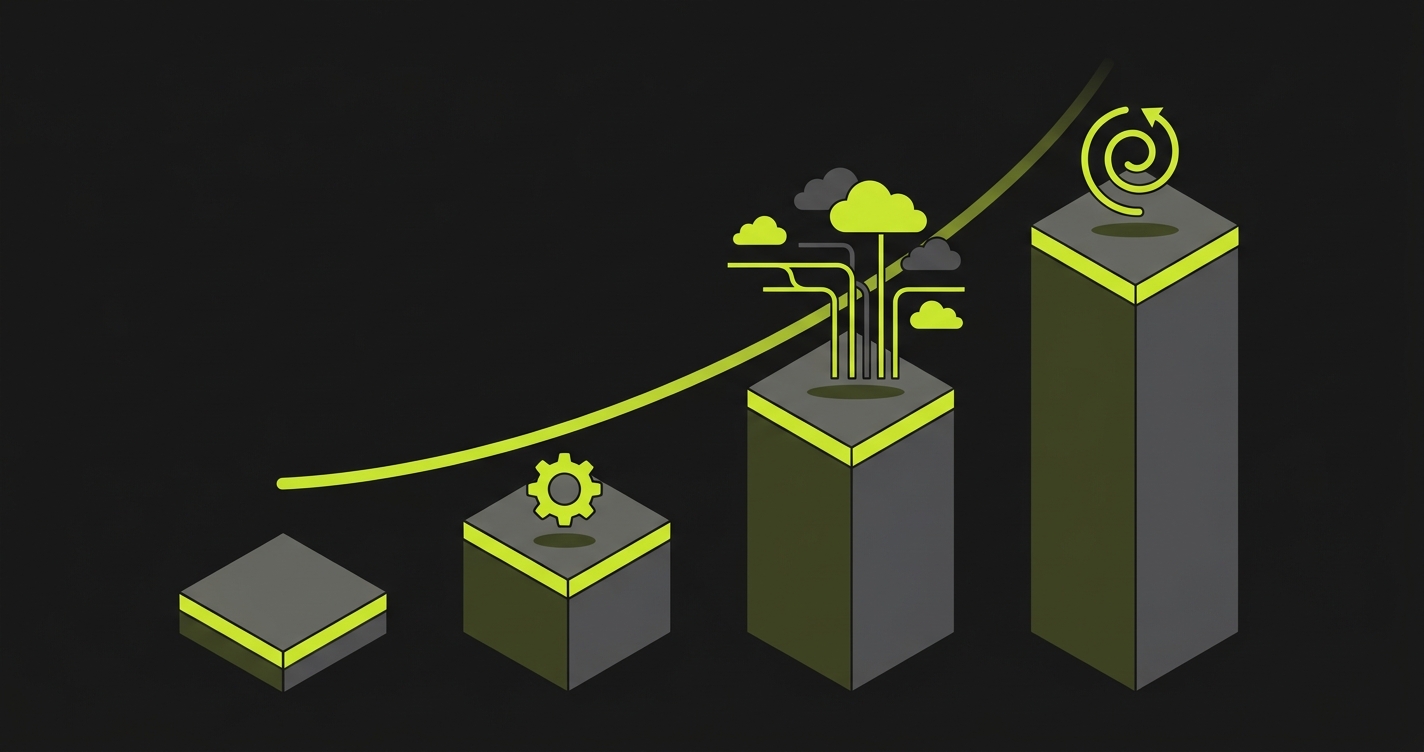
Local testing is genuinely easy. Install Playwright, write a test, run it, it works. The first hour of Playwright is one of the better developer experiences in the testing ecosystem. CI with a static URL — a staging server that is always running — is medium difficulty. You add a GitHub Actions workflow, point it at your staging URL, add browser caching. Done in an afternoon.
Then you enable preview deployments. Every pull request gets its own unique URL. Now CI cannot have a hardcoded BASE_URL. You need to extract the preview URL from the deployment webhook, pass it into the Playwright run as an environment variable, and ensure the deployment is ready before tests start. The complexity jumps sharply.
Beyond that: when your UI changes (it always does), selectors break. CSS class changes, component refactors, copy updates — any of these silently break tests that were passing last week. Keeping a growing test suite stable as the application evolves is the hidden ongoing cost that most tutorials never mention.
Playwright on Preview Environments: The Hard Part
Preview environments — ephemeral deployments created per pull request — are now standard for teams on Vercel, Netlify, Railway, and similar platforms. They are excellent for code review: reviewers can test the actual changes before merge, not a shared staging server that may have unrelated pending changes.
Playwright on preview environments requires solving three problems that do not exist with a static URL: extracting the deployment URL, waiting for the deployment to be ready, and passing the URL into the test run.
Extracting the Deployment URL
There are two clean patterns for getting the preview URL into your workflow. The first is to deploy first inside your workflow, capture the URL from the deploy step's output, then run Playwright against it. The second — and the one most teams converge on once they have been bitten — is to trigger a dedicated workflow on GitHub's deployment_status event. GitHub fires this event whenever Vercel (or any platform that writes Deployment Statuses) reports a deployment. You then read github.event.deployment_status.environment_url directly, no deploy-and-capture dance required, and you only run tests on successful deployments by conditioning on github.event.deployment_status.state == 'success'. The official Playwright CI docs cover the basic GitHub Actions scaffolding; the deployment_status trigger is a GitHub Actions feature you layer on top for preview-URL workflows.
The DEPLOYMENT_URL variable is then passed into the Playwright run. Your playwright.config.ts should read baseURL: process.env.DEPLOYMENT_URL || 'http://localhost:3000' — one line that makes every test URL-agnostic.
Tests that use page.goto('/') now automatically target the preview URL. No test code changes needed.
Writing Tests That Target the Preview URL
Tests that need to construct specific URLs (deep links, API endpoints, admin paths) should use the base URL rather than hardcoding:
new URL('/checkout', process.env.DEPLOYMENT_URL).href constructs the full URL correctly whether the base is localhost:3000 or my-app-git-feature-x-org.vercel.app. Never concatenate strings for URLs — protocol differences, trailing slashes, and path encoding bite teams repeatedly.
The Remaining Hard Problems
Even with URL extraction solved, preview environment testing surfaces several more persistent challenges.
Deployment readiness. The preview URL exists before the app is fully ready. Playwright hitting a loading skeleton or a 503 is not a test failure — it is a timing issue. You need a wait-for-ready step before the Playwright run. Three approaches are in common use: (1) the deployment_status trigger above, which already waits for state == 'success'; (2) a purpose-built community action like patrickedqvist/wait-for-vercel-preview, which polls the deployment until it returns a 2xx; (3) a manual health-check curl loop against /api/health with a retry ceiling. The first is cleanest when available; the second is a good fallback on older workflow setups; the third is the escape hatch when nothing else fits.
Vercel Deployment Protection silently 401s tests. If your Vercel project has Deployment Protection enabled on preview deployments, unauthenticated requests get a 401 and Playwright will either hang on page.goto or fail with a cryptic error. Either disable protection on preview deployments for your testing workflow, or use Vercel's Protection Bypass for Automation — a token you set as x-vercel-protection-bypass header or query parameter. This is the single most common hour-waster for teams wiring Playwright into Vercel previews. Check it first if tests hang.
Database state. Preview environments often share a database with other preview environments, or reset to a blank state. A login test needs a user to exist. An order confirmation test needs an order to exist. Managing this seeding per-preview-environment is non-trivial — it is either a setup fixture that hits your API to seed data, or a separate seeding script that runs before Playwright. This is exactly the database state problem that Autonoma handles automatically: it reads your codebase to understand what state each test requires and generates the endpoint calls to put the database in the right state before the test runs.
UI changes break tests. Every time you refactor a component, change a CSS class, or rename a data-testid attribute, some Playwright test breaks. The selector hierarchy from our Playwright Best Practices guide reduces how often this happens, but it does not eliminate it. Coded tests need ongoing maintenance. How much depends on how fast your UI moves, but for an active codebase it is consistently non-zero.
The staging environment vs preview environment guide covers the architectural trade-offs in more depth if you are deciding which approach fits your team's workflow.
Testing Approaches Compared
| Approach | Setup Time | Config Complexity | URL Management | Self-Healing | Maintenance Overhead |
|---|---|---|---|---|---|
| Autonoma | Minutes (connect codebase) | None — agents read your code | Automatic (Vercel integration or API) | Yes — tests adapt as UI changes | Zero — tests update as code changes |
| Playwright (local only) | ~1 hour | Low | Static localhost | No | Low (small suite) |
| Playwright + CI (static URL) | Half day | Medium | Hardcoded staging URL | No | Medium (grows with suite) |
| Playwright + CI + preview URLs | 1-2 days | High | Manual extraction + env vars | No | High (URL + selector + DB state) |
The Alternative: AI-Native E2E Testing
After working through the Playwright complexity curve, the honest question is: does every team need to write and maintain test code?
How Autonoma Works
The premise of Autonoma is no. Connect your codebase and AI agents take over: they read your routes, components, and user flows to plan test cases, execute those tests against your running application, and keep them passing as your code changes. Autonoma is open source and free to self-host; a managed Cloud tier is also available.
The preview environment problem disappears. Autonoma's Vercel integration injects the preview URL automatically — no webhook parsing, no env var passing, no deployment readiness polling. The database state problem disappears. Autonoma generates the API calls needed to put the database in the right state for each test. The maintenance problem disappears. When you refactor a component, Autonoma adapts the affected tests automatically without you filing a bug.
Where Autonoma Fits vs Playwright
This is not a replacement for Playwright in every scenario. If you have a well-maintained Playwright suite following strong patterns, keeping it is reasonable. The cost-benefit calculation changes for teams that are starting from zero, have a fast-moving UI, or are spending meaningful engineering time on test maintenance rather than shipping features.
For teams where preview environment testing is the specific bottleneck, the E2E testing on preview environments guide covers the architectural patterns in detail.
Playwright E2E Testing Best Practices: When to Use Playwright vs Autonoma
Playwright is the right choice when your team has strong TypeScript skills and wants full control over test logic, when you need fine-grained control over browser behavior (file downloads, clipboard, geolocation, service workers), when you are integrating tests with a specific testing framework or assertion library, or when your test suite is already mature and well-maintained.
Autonoma is the right choice when you are starting a test suite from zero and do not want to invest in test authoring infrastructure, when your UI moves fast enough that manual test maintenance is a recurring cost, when you deploy to preview environments and the URL management complexity is the blocker, or when your team does not have dedicated QA engineers and wants coverage without the learning curve of a coded test framework.
These are not mutually exclusive. Teams that use Playwright for unit-adjacent interaction tests and Autonoma for end-to-end flow coverage are a reasonable architecture — each layer doing what it is genuinely better at.
If Playwright maintenance on preview URLs is eating your week, we've seen every version of this — happy to compare notes. Grab 20 min with a founder
Playwright E2E testing means using Microsoft's Playwright library to write automated tests that control a real browser — Chromium, Firefox, or WebKit — and verify that your application works end-to-end from a user's perspective. Tests navigate pages, click elements, fill forms, and assert on visible content. Unlike unit or integration tests, E2E tests run against a fully deployed application and exercise the full stack: frontend, backend, database, and any third-party integrations. Playwright handles async automatically, supports all modern browser APIs, and runs tests in parallel across browsers.
Run npx create-playwright@latest in your project root. The installer creates a playwright.config.ts, a tests/ directory with example specs, and optionally a GitHub Actions workflow. Install browsers with npx playwright install. To run tests: npx playwright test (headless) or npx playwright test --headed (with a visible browser). For debugging, npx playwright test --debug opens the Playwright Inspector where you can step through tests one action at a time. The companion repo for this guide has a complete project structure ready to clone.
Add a GitHub Actions workflow that installs dependencies, caches Playwright browsers (keyed on the Playwright version), installs the browsers if the cache misses, runs the test suite, and uploads trace artifacts on failure. The browser caching step matters: Playwright's Chromium binary is roughly 100MB and downloading it on every CI run adds 1-2 minutes to every build. With caching it is a cache-hit instant load most of the time. For speed, add sharding: split the test matrix across multiple parallel runners using Playwright's built-in --shard flag. A 12-minute suite on one machine becomes 3 minutes across four shards.
The cleanest pattern is to trigger a GitHub Actions workflow on the deployment_status event, which fires whenever Vercel or another platform reports a deployment. Read github.event.deployment_status.environment_url directly, condition on state == 'success', and pass the URL into the Playwright run as DEPLOYMENT_URL. Configure playwright.config.ts to read it: baseURL: process.env.DEPLOYMENT_URL || 'http://localhost:3000'. Every test that uses page.goto('/') then automatically targets the preview URL. Watch for Vercel Deployment Protection — it silently 401s unauthenticated requests. Either disable it for previews or use the Protection Bypass token.
No. Autonoma is an alternative approach, not a wrapper around Playwright. With Playwright, your team writes and maintains test code. With Autonoma, agents read your codebase and generate tests automatically — no writing, no maintaining. Autonoma uses browser automation under the hood but the distinction is who owns the test code. If your team wants to own every test case and assertion, Playwright is the right tool. If you want full E2E coverage without the test code overhead, Autonoma is the faster path. Autonoma is open source and free to self-host; a managed Cloud tier is also available. Many teams use both: Playwright for interaction tests that need fine-grained control, Autonoma for end-to-end flow coverage across preview environments.
Playwright is the stronger default for most new web projects in 2026. It runs tests outside the browser in a Node.js process, supports Chromium, Firefox, and WebKit from a single suite, and has no same-origin restriction — meaning OAuth redirects, payment flows, and third-party domains all work without configuration. Cypress runs inside the browser, which gives it exceptional DevTools-based debugging. Cypress added cy.origin() as a stable API in Cypress 12 (December 2022), so cross-origin is no longer the hard constraint it used to be, but you still have to scope the origin explicitly in each test. If you need multi-browser coverage or your app crosses domains frequently during user flows, Playwright is the right choice. If you are already invested in Cypress and your app stays mostly same-origin, staying is reasonable.
Three tools, each for a different moment. Use npx playwright test --ui for interactive development — it opens UI mode with a timeline, watch-on-save, and time-travel through every action. Use npx playwright test --debug when a specific selector or assertion is misbehaving — it opens the Playwright Inspector and lets you step through actions one at a time. Use npx playwright show-trace trace.zip for post-mortems on CI failures — the trace artifact captured by GitHub Actions contains every action, network request, and DOM snapshot, letting you replay the failed run in slow motion. Finally, npx playwright show-report opens the HTML report with embedded traces, screenshots, and console output per test.
The idiomatic pattern is storageState. Run the login flow once in globalSetup, serialize the resulting cookies and localStorage to a JSON file, and configure every test project to load that state before it starts. Tests wake up already authenticated and skip the login UI entirely. Wrap this in a fixture like loggedInUser for readability, and keep a separate test project that actually exercises the login form itself — those are the only tests that should click through the login UI. For multi-role testing, save one storageState file per role (admin.json, editor.json, viewer.json) and switch between them at the project level.
Page Objects encapsulate interaction logic — how to log in, how to add an item to cart, how to navigate to a specific section. They abstract selectors and actions behind methods. Fixtures manage state — who is logged in, what data exists in the database, what environment configuration is active. Fixtures set up preconditions and tear them down after the test. The practical difference: use fixtures for test preconditions (the starting state before a test runs) and page objects for actions within a test (the steps the test takes). Many modern Playwright suites use fixtures exclusively and skip page objects for small-to-medium suites, since composable fixtures provide the same isolation with less ceremony.
Yes. Playwright's APIRequestContext lets you make HTTP requests and assert on responses directly, without a browser. It is useful for testing API contracts before the UI layer, or for setting up test data via API calls before a browser test runs. However, Playwright's API testing is not a replacement for a dedicated API testing tool like Postman or Bruno — it lacks request history, environment management, and the collaborative features those tools provide. Use Playwright for API calls that are part of a browser test flow, and a dedicated tool for pure API contract testing. The Playwright API Testing guide covers this in detail.


